By utilizing the firewall to block application software in Windows 11, you can bolster your system’s security, maintain control over network usage, protect your privacy, enhance productivity, and adhere to organizational policies or regulatory standards. This solution article discusses the steps to block application software using the firewall in Windows 11.
Steps to block an application by the firewall
- Click the Start button, search for “Windows Security,” and open the app.
- Click the “Firewall & Network Protection” option.
- Click the “Allow an app through firewall” link.
- Locate the application and uncheck both the Private and Public checkboxes.
- Click on the “OK” button to save the changes.
Detailed Explanation of Each Step
Here is a more detailed explanation of each step to block application software using the firewall in Windows 11.
Open the Windows Security app
Click on the Start button at the screen’s bottom left corner. In the search bar that appears, type “Windows Security” and press Enter. It will open the Windows Security app.
Access Firewall & Network Protection
You’ll see a list of security options in the Windows Security app. Look for the “Firewall & Network Protection” option and click on it. It is usually located in the middle of the list.
Change Firewall settings
After clicking on “Firewall & Network Protection,” you will be taken to the Firewall & Network Protection section. Here, you’ll find an overview of your firewall settings.
Block an application
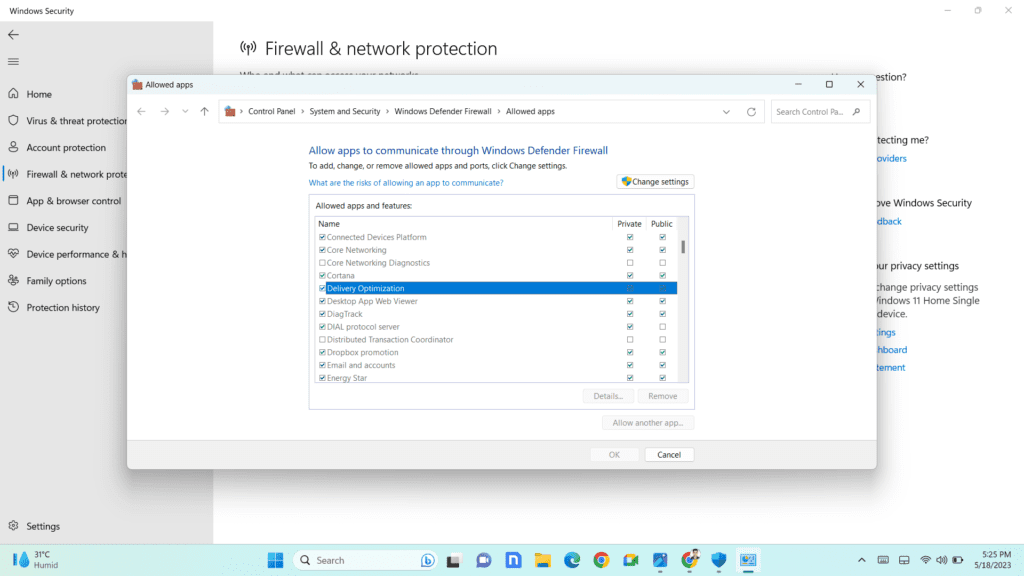
To block a specific application, scroll down until you find the “Allow an app through firewall” link. Click on it, and a new window will open, displaying a list of applications allowed through the firewall.

Block the Application and Save the changes
Locate the application you want to block in the list of allowed apps. It may be listed alphabetically, or you can use the search bar (at the top) to find it. Once you find the application, you will see two checkboxes next to it: “Private” and “Public.”
Private: Refers to your home or work network.
Public: Refers to public networks, such as those in coffee shops or airports.
To block the application completely, uncheck the Private and Public checkboxes next to it, ensuring it is blocked on all types of networks. After unchecking the checkboxes for the desired application, click on the “OK” button at the bottom right of the window. It will save the changes you made and effectively block the selected application software from accessing the network through the Windows firewall in Windows 11.
By following these steps, you will effectively block the selected application software from accessing the network through the Windows firewall in Windows 11.
Read: How to Check Chipset Driver Version Windows 11
Read the Latest Technology and Business News:
TechGolly Latest News
TechGolly Future Tech News
TechGolly Business News
TechGolly Product News
TechGolly Stock Market News
TechGolly Research News

